
Jagman's XKE Restoration
By Jagman Dave
This
page is dedicated to the restoration of my '69 Jaguar E-Type. I'd like to take
this opportunity to thank two people without whom this project would not have
been possible. Castle P., who lent me books and gave of his expertise and
inspiration, and Dennis C. -both of
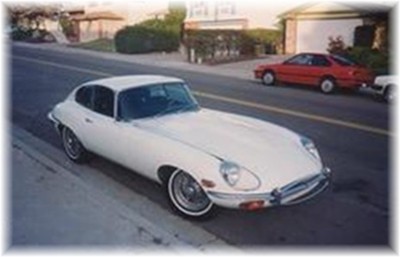
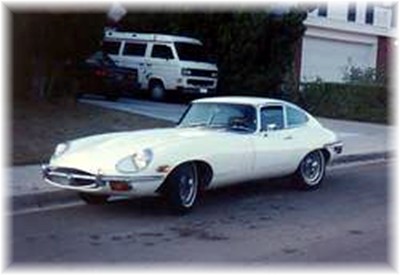
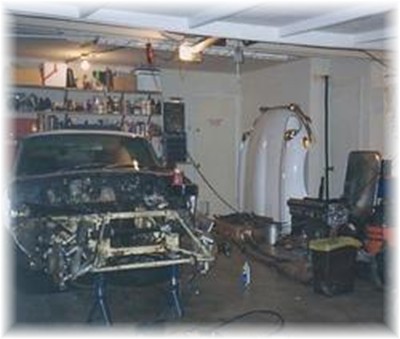
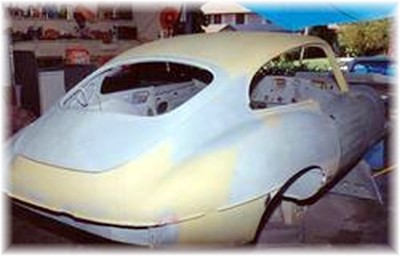
This was the car as it looked when I brought it home, you can't
see the rust or smell the gas leaks, but they're there! I also don't like the
"braces" around the nose and those nasty side marker lights. They'll have to go.
Note also those knock offs, not appropriate for this year, but much better
looking than those hex shaped ones they came with in
'69.
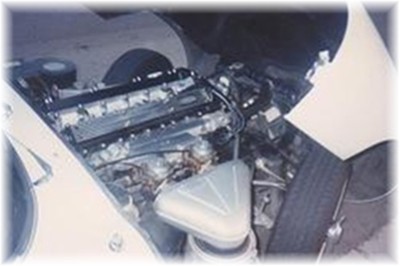
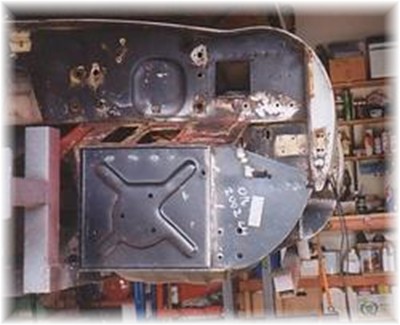
This is what the engine compartment looked like, it's all there
and all original, and the numbers match. I later got a certificate from Jaguar
Heritage verifying the originality, it's a very official and nice looking
document.
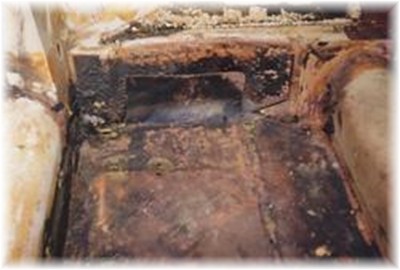
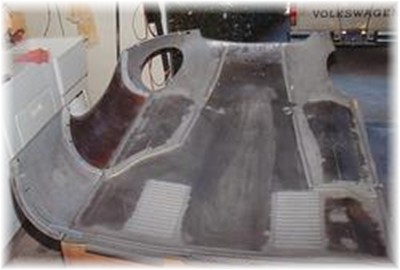
This is what the floor looked like when I pulled the carpet back.
Someone had patched a piece of metal into the floor - poorly, it was only tack
welded in a few spots - and the scary part is that the rear suspension member
attaches to this panel. My son had commented on day while riding with me "Dad, I
think I can see the ground" and he was right. There's a big hole in the top left
corner of the floor in the pic!
First things first: out with the engine. One lucky thing, my next
door neighbor's van won't fit in her garage - it's too tall - so she's
graciously allowed me to store all the parts I remove in there - and there will
be a bunch of them! You have no idea how many parts there are in a car till you
start a project like this!
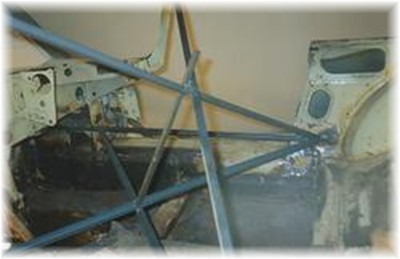
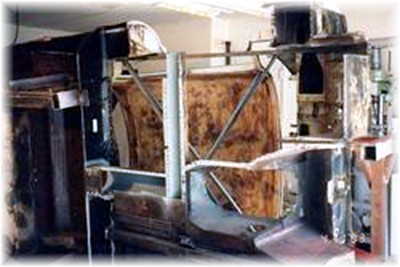
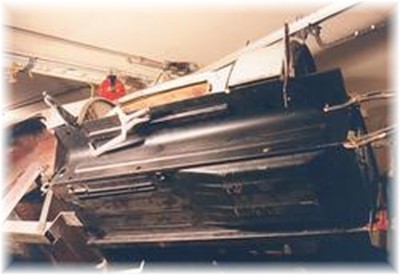
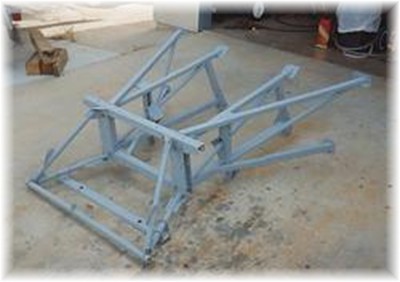
Castle P. loaned me a book on Jag restoration, and one of the techniques involved welding in some cross bracing before removing huge sections of the structure, which made a lot of sense to me. So I welded in some angle iron cross bracing to hold everything in place as I knew I would be removing a major amount of metal. At this point my welding skills were pretty basic, but they would get better by necessity!
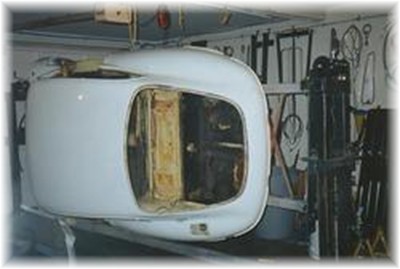
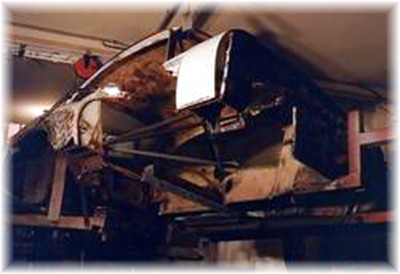
I was fortunate in having a large group of friends to borrow
techniques and tools from. One, Dennis C., lent me this "rotisserie" - I could
not have done this job without it. It was so great to be able to turn the car to
any angle I needed to be able to reach something. I could do so much better work
by not having to lie on my back and have stuff fall in my eyes or have weld
splatter run down my arms.

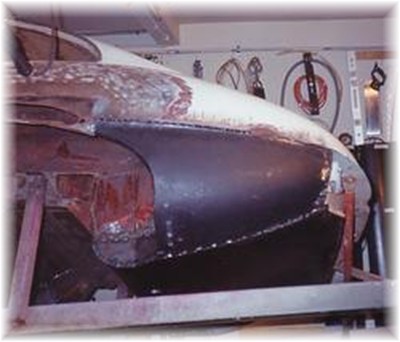
Mondo bondo! I was getting pieces as thick as two inches in this
area on the quarter panel. This car had been patched extensively, and poorly. It
all had to go!
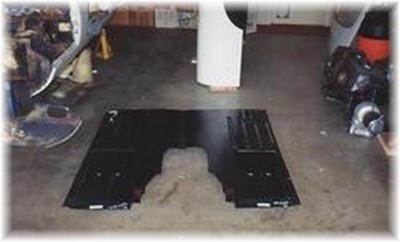
These are the new floor panels; there will be many more
pieces............
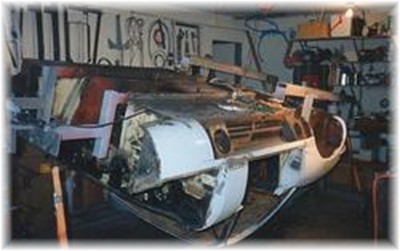
This pic shows the bottom of the car after the floor has been
removed. In the left photo, that brown area in the middle is the inside of the
roof! In the right photo, you can see the whole bottom of the car is now gone
- time to start putting some metal back on.
At this point the first parts are starting to go back together,
this is the flat part of the floor being checked for fit and spot welded in
place. Spot weld is really not the correct term; this is plug welding, where you
weld back into the hole that was made when you drilled out the spot
weld.
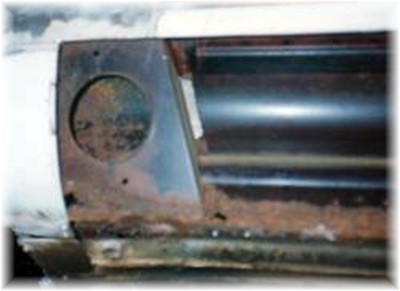
This is the inner sill going on next. These form a box member
that's very strong when the outer skin is welded on. This is how a monocoque was
built in the 60's. Today they do the same thing but with far fewer individual
pieces. The photo on the right is a before pic and shows how badly this area was
rusted.
This is the same passenger floor as on above, only this is what
it's supposed to look like!
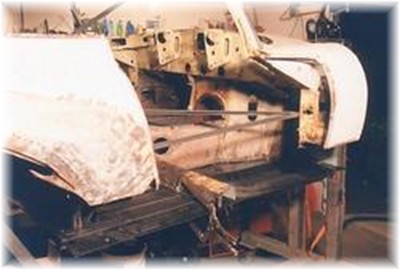
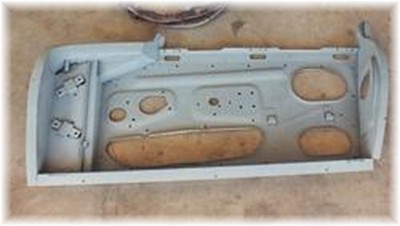
This is the front of the footwell area, the pedals are on the
inside of this panel, and the front frame assembly that carries the whole front
of the car, engine, front suspension, hood etc, attaches onto this panel so it's
a key part.
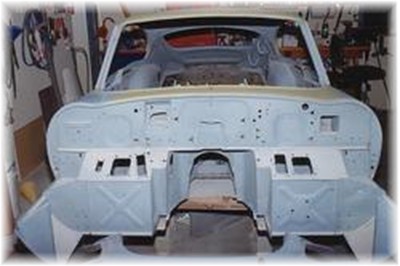
Now we're getting somewhere! Still a lot to do, but at least it's
starting to resemble a car again.
Now to the back. The entire floor was rusted out, and these
are some of the replacement panels I used to repair that
section.
Here they are being welded into place, all these pieces have to be
put in exactly the right place or doors won't close and bumpers etc won't fit
when it's done.
This is the front frame assembly, repaired and primed. You're not
supposed to weld on this assembly because it's built out of a special alloy and
it's braised at the factory. I had a couple of bad spots to fix, and I figured
with a mig welder you don't heat up the assembly like with arc or gas, so I
think it'll be OK.
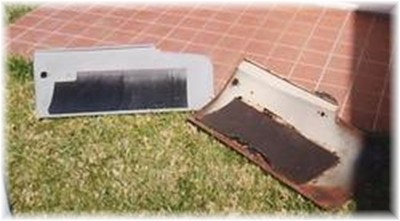
Here are the the new door skin and the old one it replaces. You
can see the rust at the bottom of the skin. This is what it looks like from the
inside - nasty. It's pretty tricky to do this; you have to skim off the outside
without messing up the shell that it welds to. Dennis explained how to do it
right. The right photo shows the inner shell primed and ready for the outer skin
to be welded on. Next, the hood.
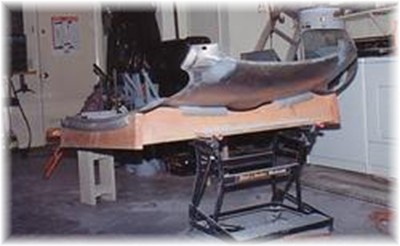
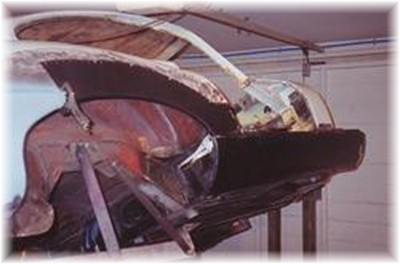
I built a wood frame to support the pieces while I worked on
them. Later, I used the frame to transport the hood assembly to the paint
shop on the back of my VW pickup. This was another idea I copied from Dennis -
he's got a million of 'em. The hood is composed of about 27 different pieces
that all have to be bolted back together just right, you have to move them
around as your assembling them so get them all to fit to each other - it's a
real challenge!
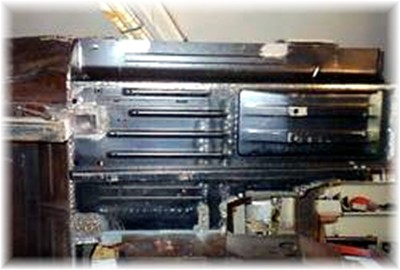
This is a view of the hood as I'm reassembling it. The dull places are areas I sandblasted, while the shiny ones were metal stripped. The hood is assembled from 27 different pieces, all bolted together.
Later, in the finished pic you can see all the hardware. The nose
of this car had been hit and they just filled it in with 3" of Bondo! I took all
that out and metal finished it back the way it should have been. I was very
proud of the way it turned out, as I had never done any metal work before
starting this project. The right photo shows the finished hood back from the
paint shop. You can see the silver plated hardware, must be a couple of hundred
bolts holding the hood together!
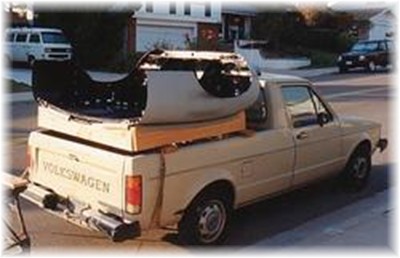
Here's the completed hood mounted in the frame on the back of my
little VW pickup on the way to the body shop for paint. It had already been in
for paint once, I had them paint the inside first, then after checking the fit,
I had the outside painted at the same time as the rest of the body so it would
all match. If you paint different parts on different days, the color can change
due to humidity or even air pressure changes, or if the painter's hung over that
day!
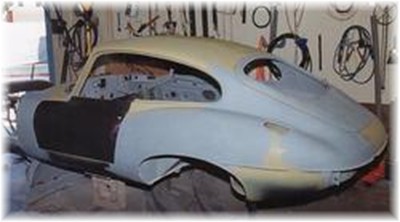
Here the body is mostly complete and in primer. I had spent months
sandblasting the entire shell so I could get a really good bond on the paint.
This car's not going to rust again!

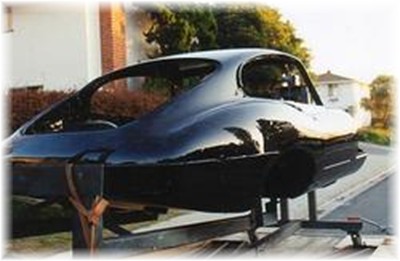
This is what it looked like about a month later when I brought it
home one evening. Wow!

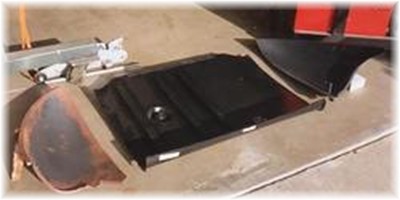
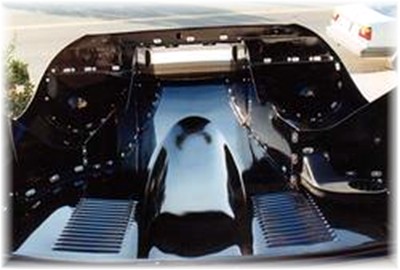
This is the new bottom of the car, what a difference! Now I have
to start reassembling everything, but before I can, I have to clean, repaint and
repair every part that's going back in. After all, you can't put old nasty dirty
parts back into a brand new shell!

This is a pic of some of the parts when they came back from being
replated, it was expensive, but easier than trying to clean and repaint every
one of them. This was another one of Dennis's techniques for getting a great
final result.
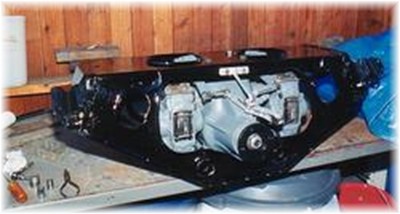
This is a pic of the differential and its carrier. The entire
diff, brake calipers and rear suspension mount to this subframe and this
assembly goes in together. You can't work on any of this once it's in the car.
There's still a lot more to add at this point. Shocks, axles and springs still
need to go on.
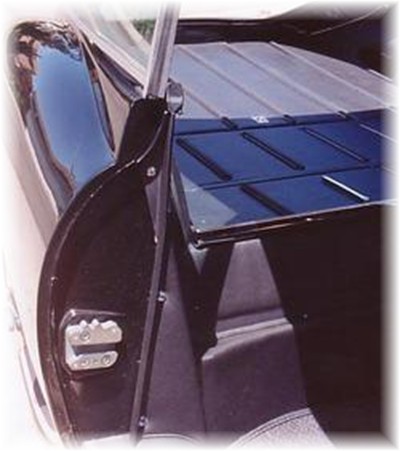
Its months later and this is a view of the transmission tunnel
insulation. It gets hot in these cars as the exhaust runs right under the trans
down the center of the car. good insulation is a
must!
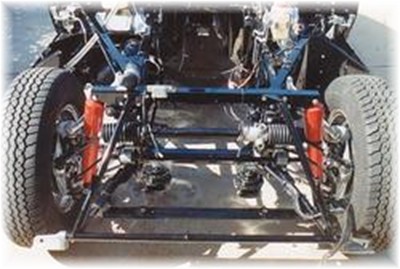
Months more have gone by and now the front frame assembly and
suspension are pretty much done. This was a very advanced car for its day, with
4 wheel disc brakes and fully independent suspension all
around.
Next, the interior. I went ahead and bought an entire new interior
kit with leather seat covers, carpets and all the soft trim including the
underpadding. This way everything was new and fit
correctly.
Here, some of the interior is done. It's hard to get good shots of
the interior as it's hard to get the lighting
right.
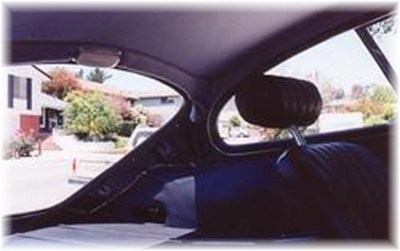
This shows the new headliner, it's done in a soft fabric with a
foam backing and glued right to the inside of the top. I also recovered all the
trim around the windows, door panels and the trim that goes over the wheel
wells.
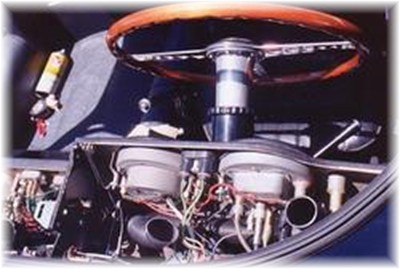
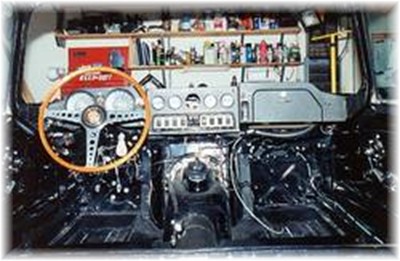
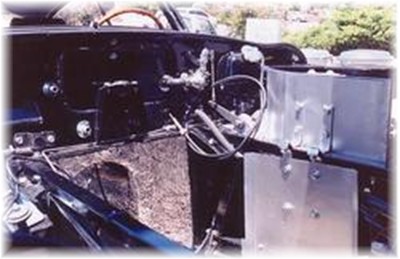
These are pics of the instruments and wiring, before the
new dash top is put on. I also refinished the wood steering wheel, it feels very
strange compared to a newer car because the rim is so thin, but it looks
great!
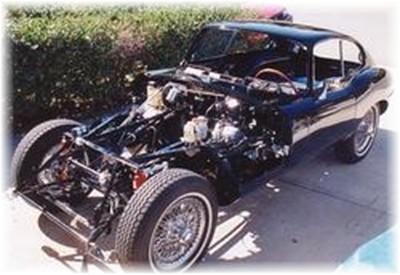
I'm in the home stretch here, it's starting to look like a car
now, but there's still a lot to do. For example, I haven't seen the engine in a
couple of years!
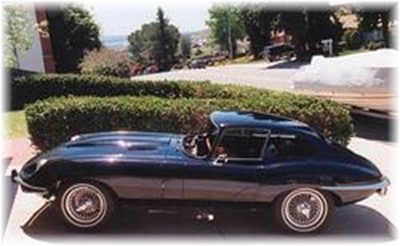
Wow, now that's what
I've been working for! You can see in this view that the side marker lights are
gone, and the knock offs show up well in this photo too. This was taken from my
driveway at my house in
Ah, there it is, just like it was a couple of years ago when I
took it out. It ran great then so it shouldn't need much - or so I
thought!

This picture was taken about three weeks later. When I tore
it down I found 2 broken pistons, a damaged combustion chamber in the head on
three cylinders and numerous broken rings! After huge bills at the machine shop
it's going back together. I added electronic ignition so I wouldn't have to mess
with points anymore.
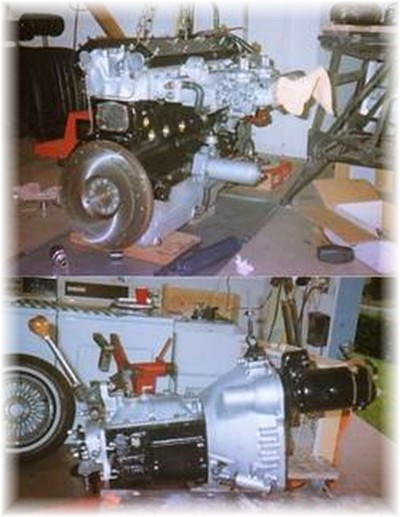
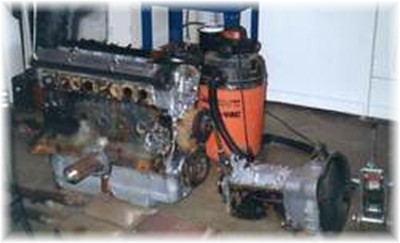
The engine and trans are back together and ready to go into the
car. Still a lot of work to do.
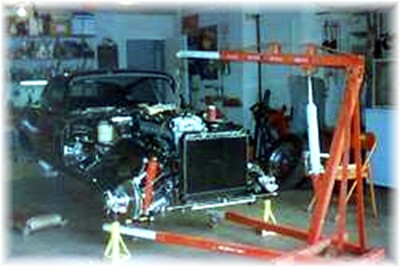
The engines about in now. I do it a little differently than the
way the factory recommends. Instead of dropping the engine in from the top,
which requires it to be trans down at a very steep angle and slowly slid in
while straightening it back to level, I leave it on the floor, raise the car up
and slide the engine under it, then set the car down over it. Then I hook the
chain on and raise it straight up into place. Works for
me.........
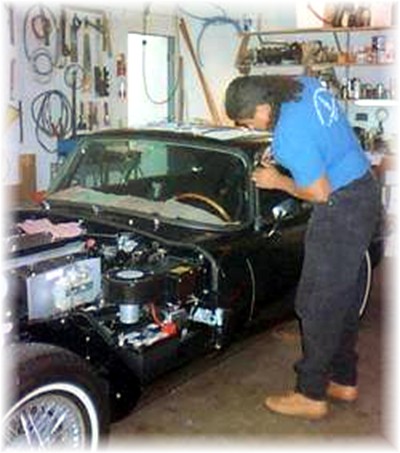
The last thing to do is install the windshield. They're pretty
hard to find anymore, but I got lucky and found one in town, and the right guy
to put it in, thanks to Castle P. He did a super job, including all the chrome
trim surrounds, and was done in about 30 min! There's still a lot to be done,
including lots of little trim bits, and reinstalling the entire hood assembly
which comes off in one big piece, but the end is in sight. I've already had it
running at this point and I'm getting anxious to drive it
again...

This last photo was taken on my wedding night in KC, just to
prove it does run! I drove it to my wedding and reception that night with my new
bride.
I don't have any more pics to add at this point, well, I have
them, but I still have to find them after my move to KC. As I locate them I'll
upload and finish the story. Thanks to all who checked my page out! Also, thanks
to Bezor and MG for inspiring (conspiring?) me to do this, it was fun going down
this memory lane and reliving the trip.
Dave
Comment on this article here